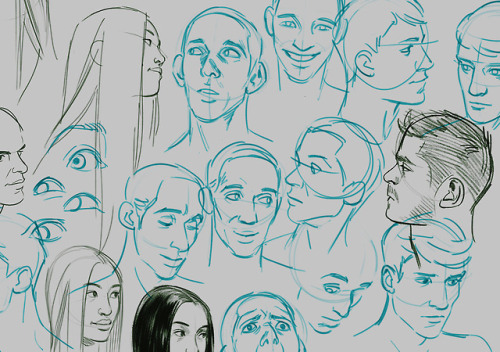
Could You Please Show Us How To Draw Faces With Nice Fangs Please.
Could you please show us how to draw faces with nice fangs please.

Hope this is helpful!
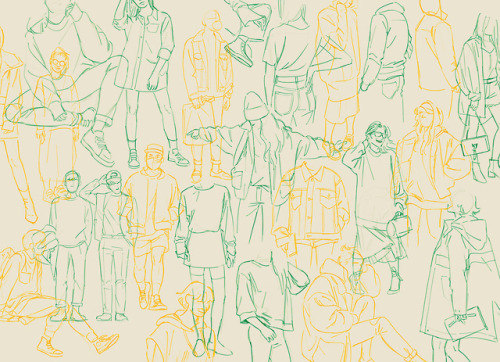
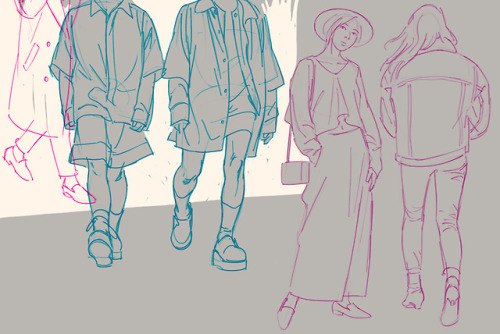
More Posts from Aether1984 and Others

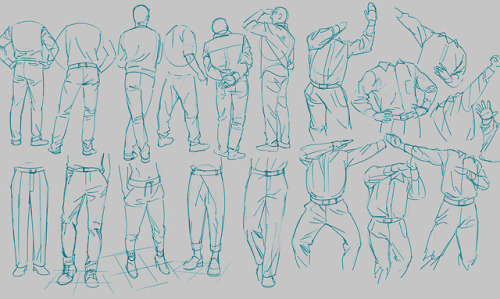
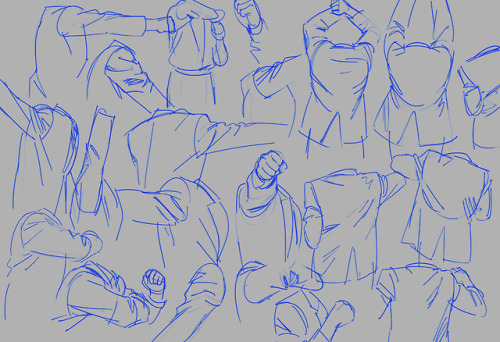
Male Anatomy
Artist: Brandon McKinney
Making this guide because I see this question time and time again on here. This post is mostly directed at white artists and writers who are wondering how to best design their characters of color. Full text description is at the end under the cut.


Full disclaimer, I am biracial (mixed E/SE asian and white) and grew up in majority poc communities, but I am just one person and this post is only based on my own experiences. If any other poc want to chime in, feel free to do so.
Once again, a full plaintext description is under the cut. If you find the information useful, please pass it on by reblogging <3
(Finally, even though I spoke vaguely on genetic inheritance, this is NOT the place to comment on certain features being mutations, as if being a mutation means something is inherently lesser or isn’t supposed to exist. Mutations is everything! All of our traits were at some point or another, an emerging mutation. Love yourself ^__^)
Keep reading
I struggle INSANELY with doing 3/4 view art. Do you have any tips? I've found a couple guides on pinterest but I'm still having a little trouble.
Hi Anon! So sorry to hear you’re struggling. 3/4th is my favorite comfort zone, but I don’t know how well I can walk you through it any better than the many tutorials out there. There are plenty that do tutorials much better than me and they all kind of follow the same format for 3/4th view, but I’ll try my best to break down my method as understandably as possible!
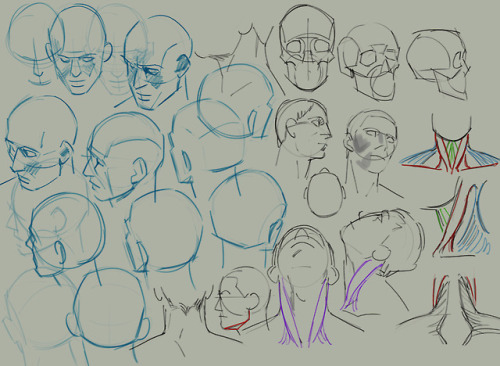
1: I always start with my eye and middle line guide in whatever direction I want them facing. The middle one is more important than the original eye line.

2: Next I’ll do my head circle to keep my skull guideline and connect it to the bottom of my middle guideline to make the jaw. You’ll want to be kind of careful about this part and not just draw a gigantic circle or one that’s too small. Try to keep it about the size you want your actual head.
Don’t worry too much about the eye line at this point as you’re mostly getting the general shape of your head at this point. You can always edit your eye line later and adjust it to where you need it to be.
If you’re doing a character that has defined cheek bones (Like Vaard who has CHEEK BONES) you can do a line from the side of the head to the side of the chin like I did here that always acts as a great guide to the general area if you’re going to define it.
Make sure this step is on its own layer separate from the rest of your lines.

3: Now using your line and circle guide, go ahead and fill out the far side in whatever shape your character’s face is (angular, round ect.). It’s easiest starting from the top of your brow bone. Keep in mind your center line as this is your direct center of the face.
Vaard’s got a pretty basic, generic face shape as a base. It’s very sharp and square so I did a lot of straight lines with little to no curves to them.
At this point, it’s best to have a reference of a face in the shape you’re going for if you struggle with this step. References are your friend when stepping into unknown territory and angles.
You can also add your hair line guide as well to make sure it’s not too high or too low.
See how the circle we started with now becomes the full skull and makes up the back? This is why we want to be careful about the placement earlier and not go way out of the anatomy you’re going for.

4: Ok now for the fun part. What I like to do, is draw little Star Trek badges under the highest point of the brow you’re going for and on the far side, connect it to the cheek. This becomes your brow/cheekbone on the far side, and your inner eye socket guide on the inside. Don’t worry if they’re too big, you can always erase them later but we’ll come back to these in a bit. You just want the top to be fairly even with each other.

5: So to help line up your eyes in ¾ths view, you can draw a line from each side of the chin or nose. The inner corner of the eyes will usually sit near or close to the same line as the nostril or chin edges. (unless you’re drawing a very narrow or very wide nose, then go with the chin guide lines instead).
My original eye line didn’t quite line up with were I wanted to actually put my eyes but it pretty much lined up with the bottom inside corners so I kept it where it was.
Using the outside ‘Star Trek Badge’ just carry that top line on down and bam, nose bridge perspective!

6: Now using those badge shapes still, you can go ahead and curve your eyebrows right on top of the lines and you have your brows! This really only works if you’re going for a neutral expression though with little to no brow movement or expression.

7: From this point, it’s just a matter of adding your details! You already have a fairly solid base and anything at this point is very easily tweaked or shifted.

8: At this point you can erase all of your guide lines (which should be on a separate layer from your actual face outlines.) and if you happen to have a character with fairly deep set eyes, you can use those badge guides again to shade the eye sockets. Just shade inside them and you have some decent shadow guides.

I hope this helped some! Sorry if it looks like most other tutorials and guides out there, but I did my best. Remember, references are your friend when doing angles you’re not familiar with, even if it’s taking a picture of your own face just to see where shadows fall or how the nose looks at that angle! (The other eye is also the worst. I am in no position to give tips on the other eye, sometimes I don’t even draw it lol).
Best wishes and wishing you the best of luck as you learn to draw in ¾ths! It’s one of the most fun angles to draw once you get the hang of it!

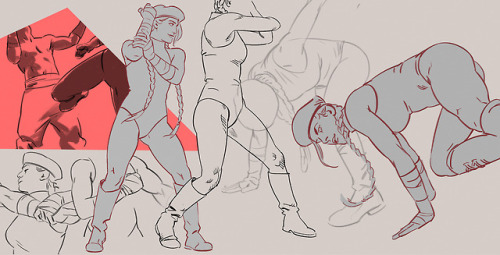
Ramon Hurtado’s demo after Rubens, step by step
how to hit your guys with the crust rays
a friend of mine was having trouble with a character of hers, he was middle-aged but looked too young, so she came to me for help. i'm something of a middle-aged-man-fan so i whipped up this quick thing to help her out. it might be useful to somebody out there so i'll share it here too!

May I ask how you draw faces? (Technique/style-wise)

a very brief thing on how do faces. You can break the rules as much as you like (I did here a bit haha), but you’ve gotta learn them first
extra:

hope it helps!


I made some tips on how to draw eyes in a side profile. I am not a professional artist.
If you don't mind me asking, how do you draw faces and heads in general?
HELLO YES IM SO SORRY I TOOK FOREVER. I’VE SORTA COVERED A LITTLE BIT OF THIS, SO I’LL LINK MY OTHER “TUTORIALS” AT THE END. HERE WE GO
SIDE PROFILE FACE AND HEAD:


FRONT PROFILE FACE AND HEAD:


MINI-TIPS:

Okay so I hope that helped!!! Obviously these vary based on the design, race, and age of your character, but it’s all rooted in the same basic,,, tHiNg.
Here’s the nose and eye tutorial (just skip the hands 😬):
https://rustic-space-fiddle.tumblr.com/post/181858381880/how-do-you-draw-hands-and-eyes-im-having-so
https://rustic-space-fiddle.tumblr.com/post/181887675515/how-do-you-make-noses-i-think-they-look-really


I wanna do more of these… >:U
-
 futuristiclampstudentoaf liked this · 1 month ago
 -
 surprise-sausage-party liked this · 1 month ago
 -
 symbroschaos05 liked this · 1 month ago
 -
 allora13 liked this · 2 months ago
 -
 raegangun liked this · 2 months ago
 -
 trocha1c reblogged this · 2 months ago
 -
trocha1c liked this · 2 months ago
-
 battzythecrazybat liked this · 2 months ago
 -
 disappointingacademicgenius liked this · 3 months ago
 -
 chilledandsweetmal reblogged this · 3 months ago
 -
 blue-eli liked this · 3 months ago
 -
 strawberrysaucereblogs reblogged this · 3 months ago
 -
 decadentstrawberrysauce liked this · 3 months ago
 -
 summerhourss liked this · 3 months ago
 -
 craftytrashnightmare liked this · 3 months ago
 -
 oddmothwingartist liked this · 4 months ago
 -
 robotenthusiastic-angelbug liked this · 4 months ago
 -
 cynicalraccoon liked this · 4 months ago
 -
 ghostrichor liked this · 4 months ago
 -
 spicypeppersoup liked this · 4 months ago
 -
 checkyourcards liked this · 4 months ago
 -
 momento-mori-archives liked this · 4 months ago
 -
 pebblesayshi liked this · 5 months ago
 -
 craftyphantombanana liked this · 5 months ago
 -
 oohpiart reblogged this · 5 months ago
 -
 daylight-neon liked this · 5 months ago
 -
 dreamerartz liked this · 5 months ago
 -
 glasses-merc liked this · 5 months ago
 -
 mosstree2 liked this · 5 months ago
 -
 emeraldeyes543 liked this · 5 months ago
 -
 phantasm-27 liked this · 5 months ago
 -
 xribcage liked this · 5 months ago
 -
 sunbunfleur liked this · 5 months ago
 -
 bitesyoubitesyouchomp liked this · 5 months ago
 -
 niechys liked this · 6 months ago
 -
 chibe-bob liked this · 6 months ago
 -
 beetle-ze-bub liked this · 6 months ago
 -
 dead-or-alive-or-go-to-heavan liked this · 6 months ago
 -
 psychoshrimpofwhimsy reblogged this · 6 months ago
 -
psychoshrimpofwhimsy liked this · 6 months ago
-
 thenuggieking liked this · 6 months ago
 -
 cosmique-oddity liked this · 6 months ago
 -
 thetropics liked this · 6 months ago
 -
 mothtrolly liked this · 6 months ago
 -
 grimzly liked this · 6 months ago
 -
 creativefandomminds liked this · 6 months ago