Stuff


stuff
More Posts from Nastysynth and Others
Quick art tip - child proportions
Ok this is a real quick one but let me show you how to get more-or-less accurate sizes for child characters. Kids are tricky to draw, they are - from toddler up to about teens people change radically almost every year so pinpointing character’s size during those years is pure hell.
What you need to do to make everything super easy for yourself is to check their Head Proportion. What makes kids look like - well, kids, is that their heads are proportionally large in comparison to their body.
Average adult is about 7,5 heads tall in comparison to their own body, however with children under 10 that number is just under 6 heads with about 1 head shorter the younger you go down to 3 heads as an infant.
Easiest way to figure the so-so head-height of a certain age is to find images of said age group and do a quick count on them

at which after you can replicate it in your own works - don’t mind if it’s not 1:1 with reference, finding images that are actually of the age you need is tricky and kids in general vary a lot so someone might be a lot taller than others. You have a bout 0,5 -1 heads of wiggle room before it starts to look way older.


Proportions are super important in art and i lovingly recommend everyone to figure out basics of them - it’s the easiest way to get notifically better with art. I could go on about proportions but let’s wrap this up. Need to note however that head proportion is not same as character height - a character can be 15 feet tall but still have head-height of 6, HH is simply a way to scale out the body.


All images are used purely for educational purposed and are credited to their sources and owners. Any image without credit was created by me.

All colours are relative.

Absolutely!!
Muzzles are one of my favorite parts of drawing animals/furry characters & really fun to draw expressions for. I always start to draw long muzzled characters the same way, by drawing two circles, one representing the basic shape of the head, and the second where the basic placement of the nose is going to be.

From there I sus out the basic shapes without worrying about details. things like the mouth and nose details I always add in last, since theyre less important in the sketching stage than the basic shapes.

For open mouthed or front-view muzzles I basically always use the same process.
This same process also works for shorter muzzled characters as well

It took me a while to get good at drawing muzzles from different angles & stuff, but once you figure out a good method that works for you its WAY easier than it seems. the most important part of drawing muzzles is just understanding the shape of your characters face.
I hope that was helpful! I dont usually make tutorials but I tried to make this as clear as I could, my sketch process is pretty messy lol.
Can you give any tips on how to draw big bulky people like Hazel/Muriel/Gretchen?
I hope this can be helpful to you!

I don’t really think about how I draw characters with different body types at this point because I’ve practiced it so much but these are some rough notes on what I do.
The core of it is to just draw using thicker shapes. Don’t worry too much about exaggeration as it’ll help get you out of the mould of drawing smaller characters by default. The neck, the arms, the torso, the legs, just draw them thicker.
Study references of fat or muscular to see how the definition changes but in principle, it isn’t that much different to drawing any body type.
I draw Hazel and Gretchen to be quite bulky but because they’re teenagers when I draw them, they’re still quite soft and lack extreme definition or sharp lines, unlike when I draw Muriel who’s meant to be extreme and musclebound. Changing how soft you draw the character or how much detail you draw changes whether they look bulky from fat or muscle.


FLOWER SYMBOLISM IN TOKYO GHOUL
From this gif post (taken with permission)
First off, we have

White carnation: innocence, remembrance
This could both represent the Keneki we see at the beginning of the series, and the inner reminiscing of the past by the current Kaneki.
Don’t forget, don’t forget
Remember who I am
The flower was stained in blood, resulting in a

Striped Carnation: refusal (I’m sorry I can’t be with you, but I wish I could)
This could be viewed as his necessary rejection of his past self, regardless of how strongly he has been clinging on to it so far. This reminds me of these two separate lines from the OP
The me that has stood in this shaken, distorted world-
Was pierced by the memory of the time I laughed so innocently
It starts as just a droplet of doubt, but Kaneki has to accept the reality, no matter how unpleasant it is
and finally,

Red Spider Lily/ Higanbana: the flower of death
Higanbana is a very famous flower in Japan so the meaning is clear here. This flower is associated with loss, longing, abandonment and lost memories. It is believed that if one meets a person one will never see again, this flower will grow along one’s path. I find that there are elements of yearning and regret a midst the finality and interpret this as Kaneki being forced to abandon it all- the death to his former self.
I have changed; I can’t return anymore
the suffering never ends
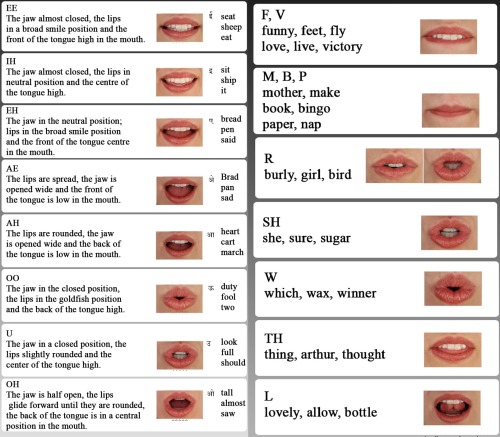
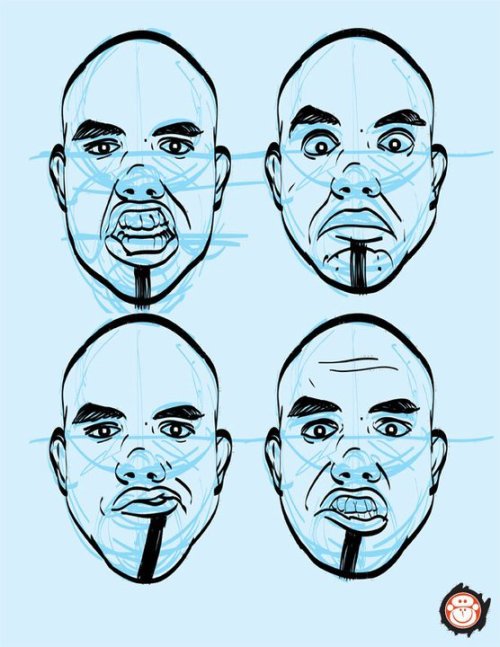
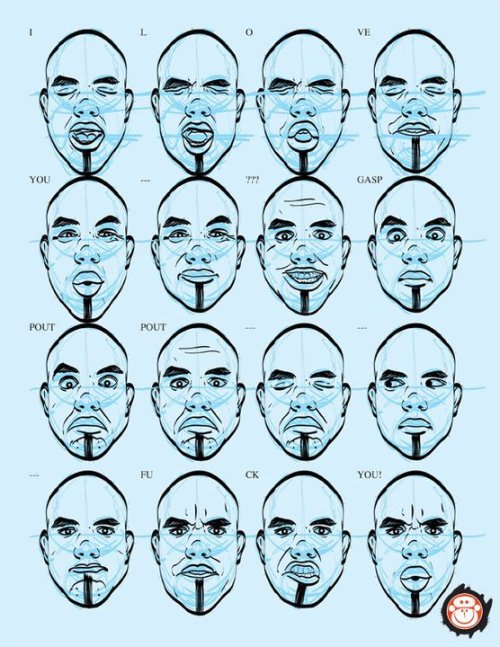
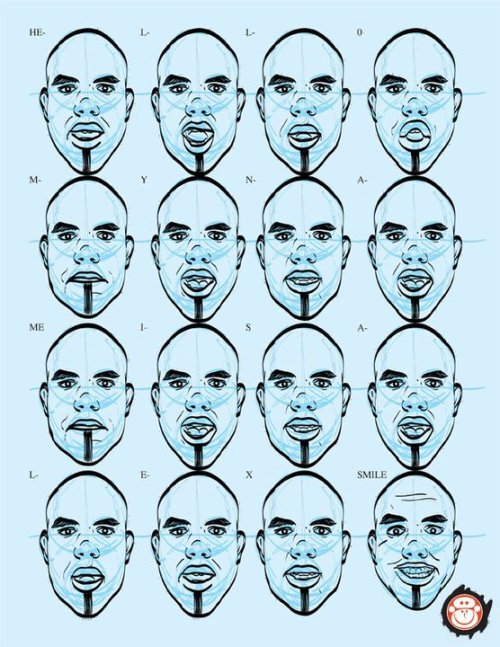
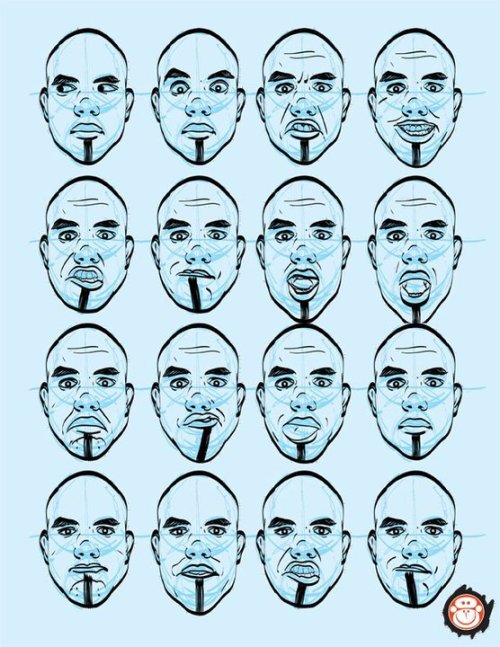
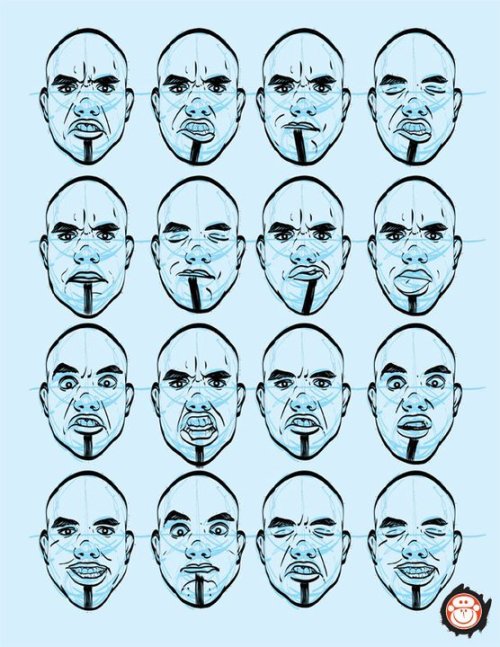
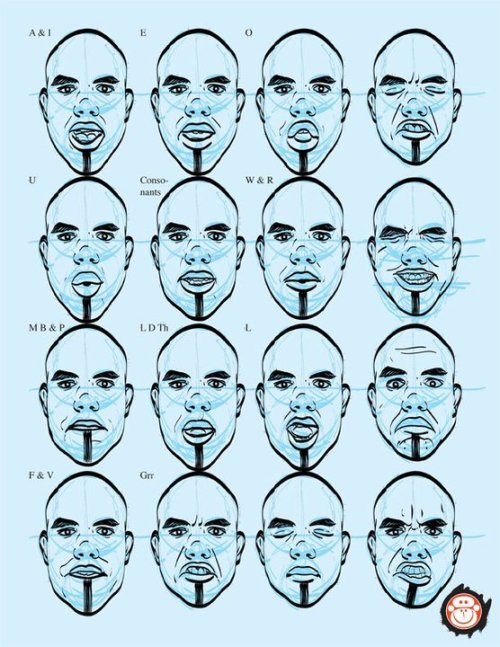
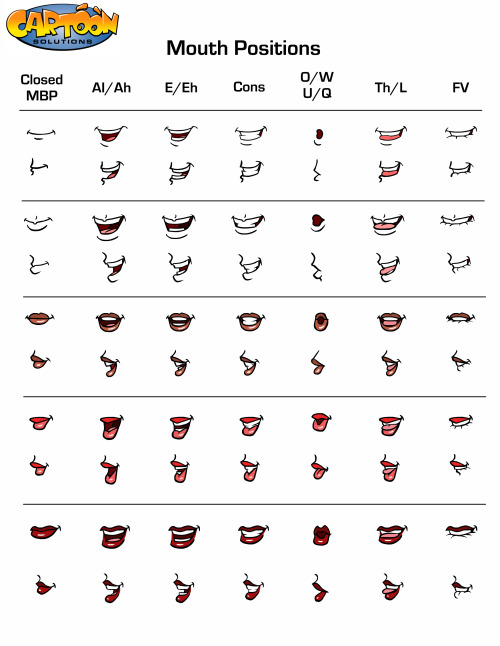
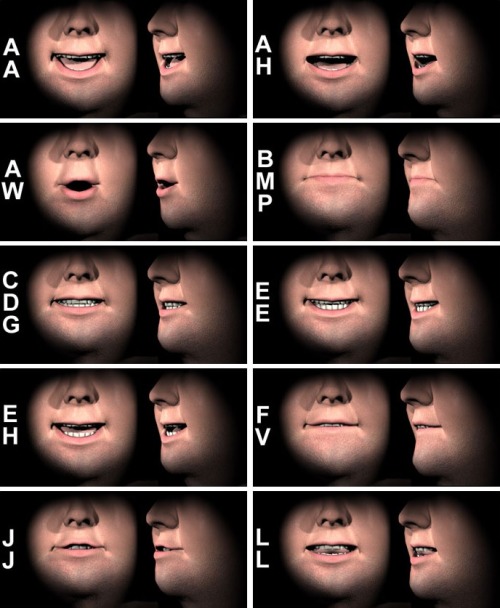
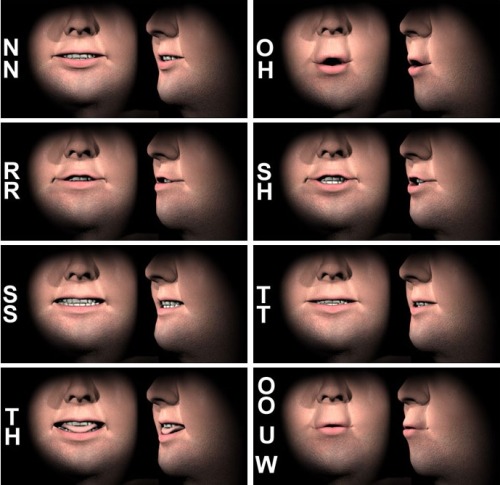
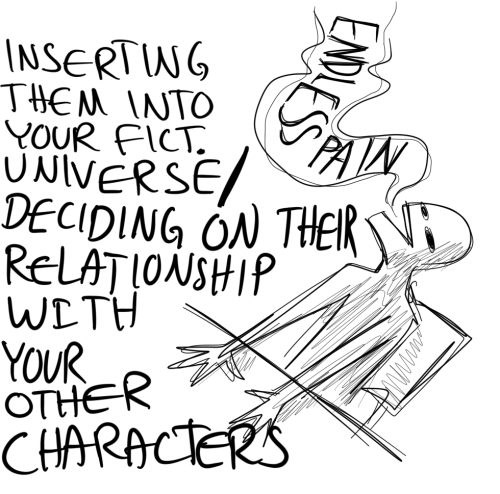
Lip Sync Tutorial Top Image Row 2 - 4 Row 5 Bottom Row
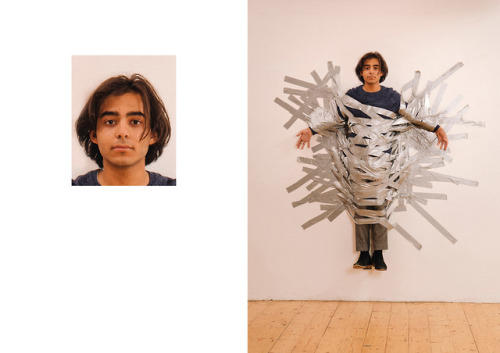
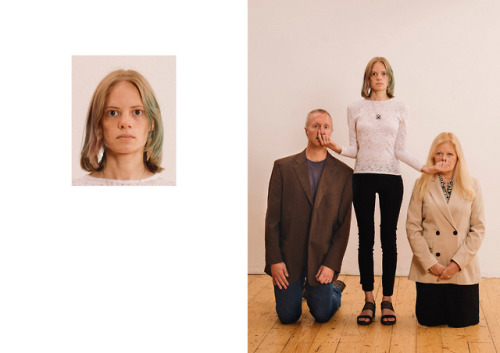

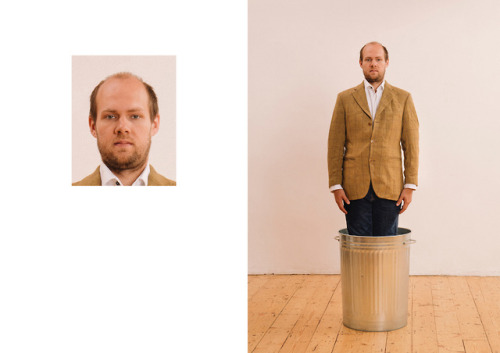
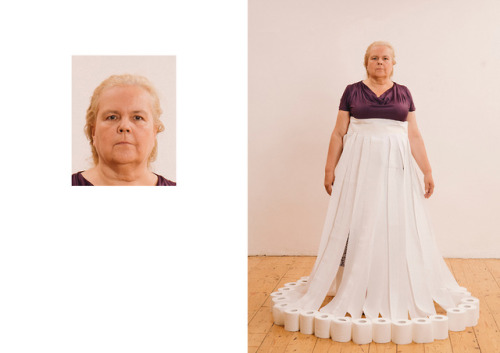
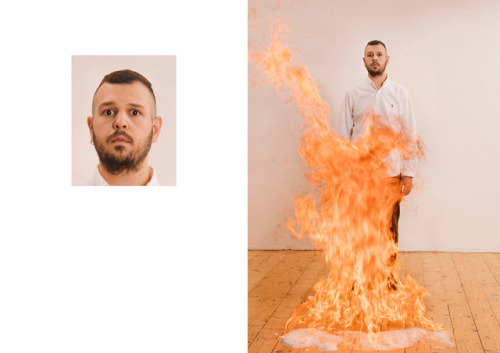
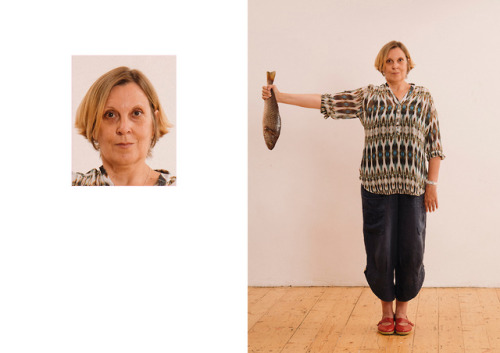
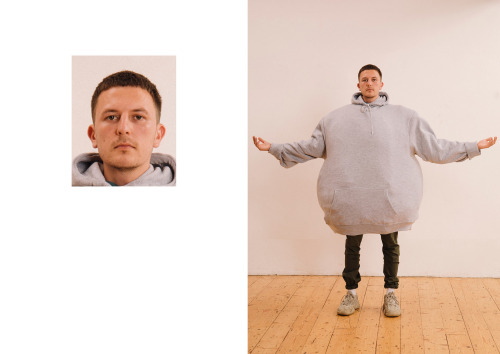
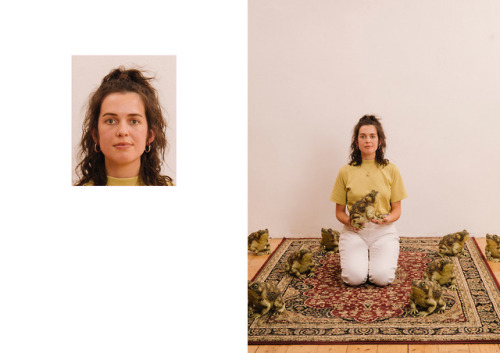
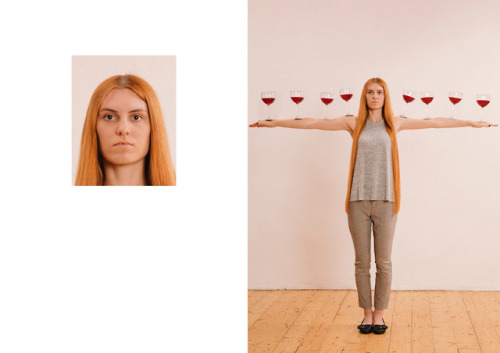
Passport Photo Series London-based visual artist Max Siedentopf recruited a cast of friends and strangers to sit for passport photos. Above the shoulders the participants are straight-faced and rigid, yet below they are balancing full wine glasses along their arms, taped to a wall, or even on fire.


a few ppl asked a while ago how to do the glitchy texture effect n i never rlly gave a good answer so heres a small tutorial:
1. add a wave modifier first, make the height really small (like 0.1-0.2), turn the speed to 1 and the width to less than 0.4
2. add a subsurf second (sometimes u dont need this one though, its mostly to stop the face/eyes collapsing on low poly models)
3. add a decimate modifier last
-
 aliakbar925 liked this · 5 years ago
 -
 nastysynth reblogged this · 5 years ago

Sylwester | i will mostly post sketches, because i'm too lazy to end them
196 posts