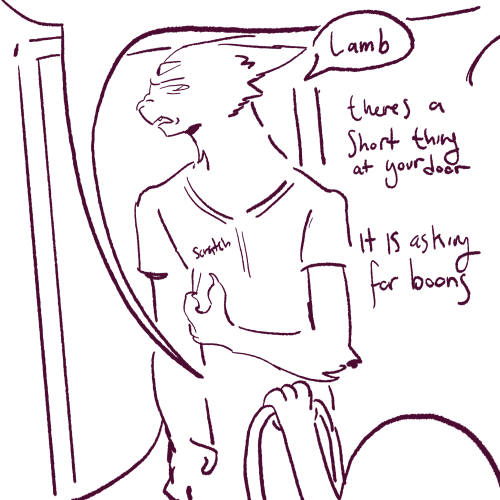
The Lamb, A Ref Sheet.
The Lamb, a ref sheet.

Like what you see? I do commissions! See pinned for details<3
More Posts from Snagleteeth and Others


Art by Matteo Moni

Feeling bad so here's Mx.Jem the Minor Fishing Drake. I'll show what this species looks like normally and maybe what the Major Fishing Drake looks like as well maybe maybe


#543 - #544 - #545. As Venipede evolves, its carapace becomes a dull cocoon as its insides liquify, and if anything tries to break it, it'll stab them aggressively until dead. It regains its lustrous carapace after evolving and becomes docile, giving rides to smaller pokémon and humans it meets.
Sponsored by @madsk3tch. Design process under read more.
I had a pretty solid idea for scolipede itself: Make it more buggy, reference centipede anatomy, but keep its horse whimsy. I did many study of centipede faces and anatomy to figure out how to place their antennae and ultimate legs (thats what the final pair of legs that look like antennae on the end of centipedes is named!). I wanted to keep some of the horn shapes, and also have the tail look like a false head like it does in many centipedes.

The weird eye shape of these guys is referencing the ocelli of centipedes: forming compound eyes. The spikes are actually referencing a milipede instead of a centipede, Desmoxytes purpurosea, who have big pink spikes. The empty spot is meant to look like a little saddle :) and the difference in color is because i think bright green feels more toxic paired with red than the greyish purple the canon one has.
venipede was easy, adapting the canon simplicity and then just adding some centipede anatomy like the antennae below the carapace.
whirlipede however, was pretty annoying. I didnt know what to do with it! i didnt want to just make a wheel but didnt want for it to just look like a venipede curled up. i decided to go the cocoon route: the carapace is protecting the goo inside. centipede dont go through cocoon phases but shhh. made it dull to keep its unique color from the rest of the line that the canon one has.
I need the rainbow trout truck so bad

Too tired to add tags but I love this and would love to see more of their campaign
D&D night of the Old Faith


They say the only way to get a steady D&D group is by using your own siblings. That means having to deal with Edgy Narinder, Murderhobo Leshy, Charge Heket and the Bard™. Thank you to all the Anons who asked me about D&D for Shamura and their siblings! You inspired this little silly comic, I hope you see and like it!💙


TRICK OR TREAT! Mind giving me some sweets?


please accept this 30 min halloween comic as a treat lol
Hello! I was wondering what company you use for your sticker sheets? I bough one from your Ko-Fi shop and really like the quality, and the pricing you were able to sell at is waaaaaay more reasonable compared to any of the companies I've seen and used myself. Is it a POD company, or a mass purchase of them to sell on your own?
Thank you for your time if you're able to respond!
I'm really glad you like the quality, because I actually make them by hand at home! (Please forgive the lighting, my bedroom is my office lmao.)

I don't use a company (and Idk what a POD company is sorry!) but making them at home gives a lot more freedom of stock, just be wary it can be very time consuming depending on how many you need to make.
I've had other people ask before, so here's a rundown of how I make my stickers at home: At most you'll need:
Printer
Sticker paper (this is the type that I use)
Laminator and lamination paper (the lamination paper that I use.) You can also use adhesive non-heat lamination paper if you don't have a laminator, gives you the same result, just be careful of bubbles. You will get double your worth out of a pack because we are splitting the pouches to cover two sticker sheets.
Your choice of a sticker cutting machine or just using scissors.
First, I use Cricut's software to print out the sticker sheet with the guidelines around the corners so the machine can read it. If you do NOT have a Cricut machine, open up your art program, make a canvas of 2550x3300 and fill it up with your sticker design with some cutting space between them. This the 8.5x11 size for the sticker page.

I usually have bleed selected so the cut comes out cleaner. Tip for non-Cricut users below: Increase the border around your sticker design to fake the 'bleed' effect for a cleaner cut.


These are the print settings I use for my printer. I use the 'use system dialogue' to make sure I can adjust the settings otherwise it prints out low quality by default. Make sure if you're using the above paper that you have 'matte' selected, and 'best quality' selected, these aren't usually selected by default.


So you have your sticker sheet printed! Next is the lamination part. I use a hot laminator that was gifted to me, but there is no-heat types of lamination you can peel and stick on yourself if that's not an option.
(This is for protection and makes the colors pop, but if you prefer your stickers matte, you can skip to the cutting process.)
Important for Cricut users or those planning to get a Cricut: You're going to cut the lamination page to cover the stickers while also not covering the guidelines in the corners. First, take your lamination page and lay it over the sheet, take marker/pen and mark were the edges of your stickers are, and cut off the excess:

(I save the scrap to use for smaller stickers or bonuses later on)
After you've cut out your lamination rectangle, separate the two layers and lay one down on your sticker sheet over your stickers with matte side down, shiny side up. (Save the other sheet for another sticker page)
The gloss of the lamination will prevent the machine from reading the guidelines, so be careful not to lay it over them. It also helps to cut the corners afterwards to prevent accidentally interfering with the guidelines.

Now put that bad boy in the laminator! (Or self seal if you are using non-heat adhesive lamination)

Congrats! You now have a laminated page full of stickers.
For non-cricut/folks cutting them out by hand: this is the part where you start going ham on the page with scisscors. Have fun~
Cutting machine: I put the page on a cutting mat and keep it aligned in the corner, and feed it into the machine. For laminated pages I go between 'cardstock' and 'poster board' so that it cuts all the way through without any issues, but for non-laminated pages or thinner pages, I stick for 'vinyl' and 'light card stock'. Kinda test around.

Now I smash that go button:


You have a sticker now!
The pros of making stickers at home is that you save some cost, and you have more control of your stock and how soon you can make new designs. (I can't really afford to factory produce my stickers anyway)
However, this can be a very time consuming, tedious process especially if you have to make a lot of them. There is also a LOT chance for some errors (misprints, miscuts, lamination bubbles, ect) that will leave you with B-grade or otherwise not-so-perfect or damaged stickers. (Little note, if you have page mess up in printing and can't be fed into the cricut machine, you can still laminate it and cut it out by hand too.)
I have to do a lot of sticker cutting by hand, so if you don't have a cricut don't stress too much about it. I have an entire drawer filled to the top of miscuts/misprints. I keep them because I don't want to be wasteful, so maybe one day they'll find another home. Sucks for my hand though.
But yeah! This is how I make my stickers at home! Hope this is helpful to anyone curious
Cotl doll I made a year or two ago. Still very proud of him!
-
 sugarfanfic6 liked this · 3 weeks ago
 -
 littlestarrys liked this · 1 month ago
 -
 artist-of-fantasy reblogged this · 1 month ago
 -
artist-of-fantasy liked this · 1 month ago
-
 comfortably-indoctrinated reblogged this · 1 month ago
 -
 submitwittyblognamehere liked this · 1 month ago
 -
 aether-antics liked this · 1 month ago
 -
 talkwithtatsu liked this · 1 month ago
 -
 kinghimst reblogged this · 1 month ago
 -
kinghimst liked this · 1 month ago
-
 pillowfort-engineer reblogged this · 1 month ago
 -
 hysterical-random-things reblogged this · 1 month ago
 -
 sophelisticated liked this · 1 month ago
 -
 sinsofthecult liked this · 1 month ago
 -
 dragonfantasy94 liked this · 1 month ago
 -
 mittensit liked this · 1 month ago
 -
 gumibuki liked this · 2 months ago
 -
 the-og-plant liked this · 2 months ago
 -
 wasp-infused-candy liked this · 2 months ago
 -
 aveloka reblogged this · 2 months ago
 -
aveloka liked this · 2 months ago
-
 fiveratsindisguise liked this · 2 months ago
 -
 obsceneovine liked this · 2 months ago
 -
 racconbabydoll liked this · 2 months ago
 -
 fuzzy-sock liked this · 2 months ago
 -
 deltahex27 liked this · 2 months ago
 -
 kstogosstuff liked this · 2 months ago
 -
 billazzy liked this · 2 months ago
 -
 ekt0plasma reblogged this · 2 months ago
 -
 dreams2419 liked this · 2 months ago
 -
 karamatsuboy-aj liked this · 2 months ago
 -
 acestartum liked this · 2 months ago
 -
 freddy-fort-burd liked this · 2 months ago
 -
 willowanomaly liked this · 2 months ago
 -
 xxghost-bloodxx liked this · 2 months ago
 -
 mkanuhea liked this · 3 months ago
 -
 thatonyxperson liked this · 3 months ago
 -
 inknanda67 liked this · 3 months ago
 -
 spitly reblogged this · 3 months ago
 -
 gargoylegirlcock reblogged this · 3 months ago
 -
gargoylegirlcock liked this · 3 months ago
-
 sebbyfloof reblogged this · 3 months ago
 -
sebbyfloof liked this · 3 months ago
-
 verivad liked this · 3 months ago
 -
 handsomestrat liked this · 3 months ago
 -
 eldritch-puppy reblogged this · 3 months ago
 -
eldritch-puppy liked this · 3 months ago
-
 foxkid-draws1323 liked this · 3 months ago
 -
 transparentmilkshakeblizzard liked this · 3 months ago
 -
 default-name-and-or-title liked this · 3 months ago
