˚ ・ ✧・゚: *✧・゚:* Hello Rays Of Sunshine *:・゚✧*:・゚✧ ・ ˚

˚ ・ ✧・゚: *✧・゚:* Hello rays of sunshine *:・゚✧*:・゚✧ ・ ˚
Here’s a basic tutorial on how I make my gifs, so if you have nothing to do and want to learn how to do it my way, feel free to hop in the boat and enjoy the ride! (this is very basic stuff, so things like coloring/sharpening/adjusting/effects will be addressed later).
Feel free to send me an ask if there is anything that’s confusing and I’ll try my best to help! Everything’s under the cut :)
Keep reading
More Posts from Inorddinary and Others


behind the scenes of saw (2004), dir. james wan.

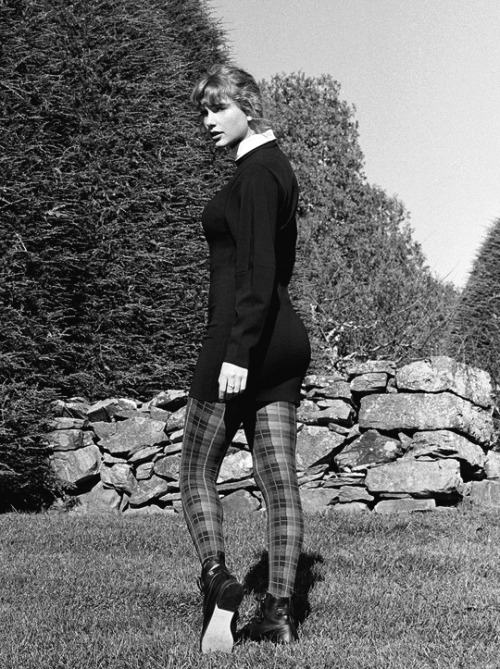
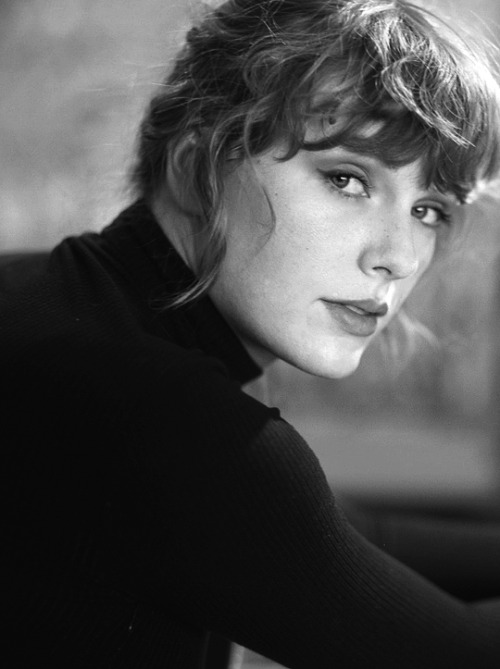
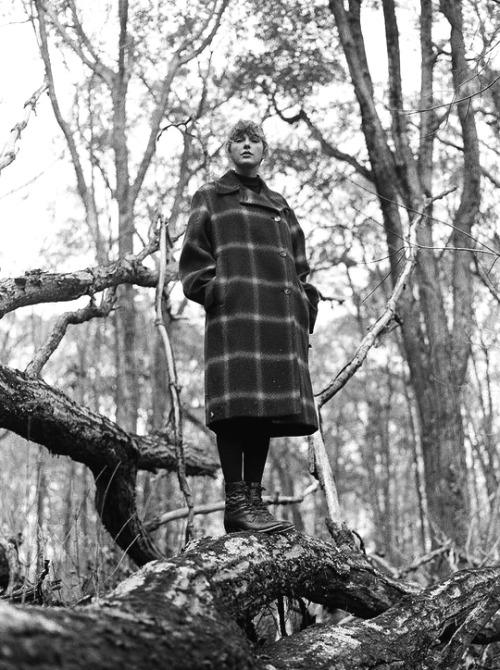

TAYLOR SWIFT photographed by Beth Garrabrant for “evermore” Album Photoshoot.
oi prin, tudo bem? amei seu tutorial!!! baixei o ps 2024 que está linkado lá e estou com uma dúvida, as fotos aparecem bem diferentes no programa e no arquivo salvo... vc sabe como posso consertar isso? faço icons e tá me atrapalhando um pouco na hora de visualizar os psds :/
oiê, tudo bem e contigo? então, isso já aconteceu muito comigo tbm e eu me bati demais até achar o problema jskdfjks
mas enfim, vc vai precisar fazer alguns ajustes dentro do painel de cores no photoshop. pra isso vá em edit > color settings > e selecione a opção “north america general purpose 2”; depois vc faz alguns ajustes, deixando assim:

depois de fazer estes ajustes, quando vc for abrir uma foto, vai aparecer uma mensagem dizendo que o perfil de cores não bate com os ajustes, então é só vc selecionar a segunda opção, assim:

OU se vc não quiser fazer a mudança já antes da foto abrir, vc pode mudar depois de aberta, é só ir em edit > convert to profile > selecione sRGB IEC61966-2.1, nessa janela assim:

já para visualizar sempre como vai ficar a edit final com o psd, vc pode ir em view > proof setup > selecione a opção “internet standard RGB (sRGB)”, assim:

espero que te ajude! hehe qualquer coisa, se seu photoshop for em português ou se vc tiver outras dúvidas, só mandar outra mensagem que vou ficar feliz em ajudar :)

By Brian Doben & Sarah Barlow for Red Album - 2012
to graphic makers: 💜✨💕💖💙💞🧡💚

SCARLET LEAVES by © peachcoloring
Don’t share this psd and do not put in pack and do not use this resource as a basis for creation. You can adjust the layers if you need to. Please, don’t claim as your own. If there is any problem, send me a message.
This is a free file. If there are any issues downloading our file, please send me a message, and I will get in touch. In my Payhip store, you can purchase any resource with discounts. Visit my store here and on DeviantArt. Compre qualquer recurso na minha loja do Payhip com descontos ou compre por pontos acessando meu DeviantArt.
This is our work done with effort and time spent. Please do not copy do not violate, and do not sell it as if it were yours. Please, if your photo is here, talk to me. It is not my intention to violate the copyright rules.


I've never had this. My whole life. I want to. I wanna have it.


Avril Lavigne for Entertainment Weekly, (2002).
Como colocar conteúdo personalizado em uma página de tags específica - Parte 1

A uns dias atrás eu recebi uma ask perguntando se era possível colocar a caixinha da Ask em uma página de perguntas respondidas (para saber como fazer uma página somente de asks respondidas leia este tutorial aqui). Então eu montei um script para executar essa função e vim compartilhar com quem quiser usar.
Esse método também pode ser usado para adicionar conteúdo personalizado a outras páginas do tema, como a página da Ask e a do Submit, com exceção apenas da página Archive.
Keep reading


COMO FAZER EFEITO BONECA NO PHOTOPEA? Tutorial por @gmfioart
↠ PASSO 1. Vá em Filtro > Ruído > Reduzir Ruído.
Na aba que abrir, preencha: FORÇA: 5 > PROTEGER DETALHE: 0%.
↠ PASSO 2. Vá em Editar > Atenuar.
Na aba que abrir, ajuste a OPACIDADE: 60% e MODO DE MISTURA em ‘normal’ .
↠ PASSO 3. Vá em Filtro > Aguçar > Tornar arestas nítidas. Em seguida, vá em Editar > Atenuar.
Na aba que abrir, ajuste a OPACIDADE: 35% e MODO DE MISTURA em ‘normal’.
↠ PASSO 4. Vá em Filtro > Aguçar > Aplicação inteligente de nitidez.
Na aba que abrir, preencha Quantia: 200% > Raio: 0,2px.
↠ PASSO 5. Vá em Filtro > Borrão > Desfocar. Em seguida, vá em Editar > Atenuar.
Na aba que abrir, ajuste a OPACIDADE: 30% e MODO DE MISTURA em ‘normal’.
↠ PASSO 6. Vá em Filtro > Galeria de filtros… > Procure por “Arestas Acentuadas”.
Na aba que abrir, preencha “EDGE WIDTH: 4 > EDGE BRIGHTNESS: 27 > SUAVIDADE 2 e clique em ACEITAR.
↠ PASSO 7. Vá em Editar > Atenuar. Na aba que abrir, preencha OPACIDADE 35%.
↠ PASSO 8. Vá em Filtro > Borrão > Desfoque gaussiano. Na aba que abrir, preencha o RAIO: 0,8 px.
↠ PASSO 9. Vá em Editar > Atenuar. Na aba que abrir, preencha OPACIDADE: 25%.
↠ PASSO 10. Vá em Filtro > Aguçar > Aplicação inteligente de nitidez. Na aba que abrir, preencha QUANTIA: 200% > RAIO: 1,1 px.
↠ PASSO 11. Vá em Editar > Atenuar > preencha OPACIDADE: 26%.
TCHARAM!!
-
 perplexedit liked this · 2 months ago
 -
 fallingstarinspace liked this · 3 months ago
 -
 spinaweb liked this · 4 months ago
 -
 flintsdragon liked this · 4 months ago
 -
 lucky-princess liked this · 9 months ago
 -
 erysione liked this · 1 year ago
 -
 inorddinary reblogged this · 1 year ago
 -
inorddinary liked this · 1 year ago
-
 notalesnomemories liked this · 1 year ago
 -
 posiresources reblogged this · 1 year ago
 -
 laylaeelfaouly liked this · 1 year ago
 -
 riptidelover liked this · 1 year ago
 -
 aprilsresources reblogged this · 1 year ago
 -
 dreamautonomy reblogged this · 1 year ago
 -
 myusefullstuff reblogged this · 1 year ago
 -
 elevenriver liked this · 1 year ago
 -
 alistairstheirins liked this · 1 year ago
 -
 lovetaylor-s liked this · 1 year ago
 -
 dailyresources reblogged this · 1 year ago
 -
dailyresources liked this · 1 year ago
-
 gguksvnery liked this · 2 years ago
 -
 manikas-whims liked this · 2 years ago
 -
 dav1sley liked this · 2 years ago
 -
 simplymakkari liked this · 2 years ago
 -
 hotchannah liked this · 2 years ago
 -
 lokiilaufeysonss liked this · 3 years ago
 -
 g0ldnmirrorball liked this · 3 years ago
 -
 koigoldfish reblogged this · 3 years ago
 -
 sevenknightingales liked this · 3 years ago
 -
 jaeyong liked this · 3 years ago
 -
 boludeandingafull liked this · 3 years ago
 -
 fictionalinfinity liked this · 3 years ago
 -
 wodimus liked this · 3 years ago
 -
 yong-flight reblogged this · 3 years ago
 -
 eternallydamnedjay liked this · 3 years ago
 -
 riftclaw liked this · 3 years ago
 -
 introspectivememories liked this · 3 years ago
 -
 616yelena liked this · 3 years ago
 -
 doomsgf-remade reblogged this · 3 years ago
 -
doomsgf-remade liked this · 3 years ago
-
 bunnystarry liked this · 3 years ago
 -
 gayruledge reblogged this · 3 years ago
 -
 thaablvckgal liked this · 3 years ago
 -
 miraclegemz liked this · 3 years ago
 -
 pastelplushie64 liked this · 3 years ago
 -
 hartrathaway liked this · 3 years ago
