DIY Laundry Detergent
DIY Laundry Detergent
GUYS, THIS WORKED. YOU DON’T EVEN KNOW HOW EXCITED I AM.
My first homesteading project was a roaring success! I know this probably means I’m doomed for failure in the future (ever the optimist, I am), but YAY for now.
!!
Okay, done squealing. Here’s what happened:
I used this recipe from Budget101.com. I had several detergent recipes pinned, but I’m partial to a liquid/non-powder detergent. Especially when said liquid is concentrated (you only need to use one tablespoon per load here).
I did this on Sunday as a weekend project with my mom, and was 90% convinced I was going to have a nasty, sudsy mess all over her stove. But instead, we made THESE:
Aren’t they gorgeous?
But I’m getting ahead of myself again.
Alright.
Ready?
Here’s what you need:
1 cup Borax
1 cup Arm & Hammer Washing Soda
1 bar Fels Naptha
4 cups water
2 1-quart Mason jars
Total cost for 128 loads of laundry: $1.76
Grate the bar of Fels Naptha using a cheese grater (yes, really). It’s super soft, and shouldn’t be too difficult. It will take about five or ten minutes, depending on your pressure and attention span.
Put the 4 cups of water in a LARGE pot (big enough to take on all the ingredients, plus room for a bit of foam) and set it to high, waiting for a boil.
Measure out the Borax and Washing Soda, mix together well in a bowl.
Once the water begins to boil, add the grated Fels Naptha gently, and reduce the heat to medium. Stir constantly until the soap is completely dissolved, about 10-15 minutes. Be careful not to let this boil over, or you will end up with the sudsy mess I was anticipating. This is the extent of foam you should see:
Once the Fels Naptha has melted, remove the pot from the heat and add the blended Borax and Washing Soda. It’s essential you stir constantly here as well, lest you end up with an icky, grainy detergent that could leave residue on your clothes. Stir for about 5 minutes, or until you no longer feel graininess on the bottom of your pot.
Next, pour the detergent equally into your two Mason jars. Add water until the liquid reaches the “shoulders” of the jar (the rounded part near the top). There should be about 1.5 - 2 inches of air space at the top of the jar.
Put the lids on your jars and set them upside down. Leave them like this for 4-5 hours, so they can do their separation thang. Have a Netflix marathon, make a four-course dinner, go for a run, whatever. Just DON’T TOUCH THE JARS until those 4-5 hours are up!
When you come back, they’ll look like this:
Kinda nasty, eh? Just wait – your detergent is about to become oh-so-beautiful.
Grab a mixing bowl and your hand mixer, and empty out the contents of both jars into the bowl. Make sure you scrape the sides of the jar to get all the detergent out. Now whip it! Whip it good!
…until your detergent is light and fluffy.
Ta-da! Transfer back into your (rinsed and dried) jars, and you’re done!
To use, simply add one tablespoon of detergent per load of laundry. Add it directly in with the clothes, no matter what your machine says. Take a spoonful, and put it under the running water, allowing the detergent to run off the spoon onto your dirty clothes. Close the machine up and you’re done!
Notes: Since the soaps are already dissolved in this detergent, it won’t leave any residue on your clothes like other DIY detergents can. Also, at $1.76 for 128 loads of laundry, this one is a real money saver!
Happy Laundering,
Becca, The Semi-Homesteader
More Posts from Copperfingertips and Others


8 vegetables that you can regrow again and again.
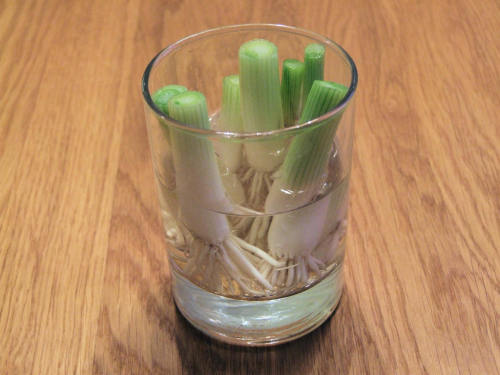
Scallions
You can regrow scallions by leaving an inch attached to the roots and place them in a small glass with a little water in a well-lit room.
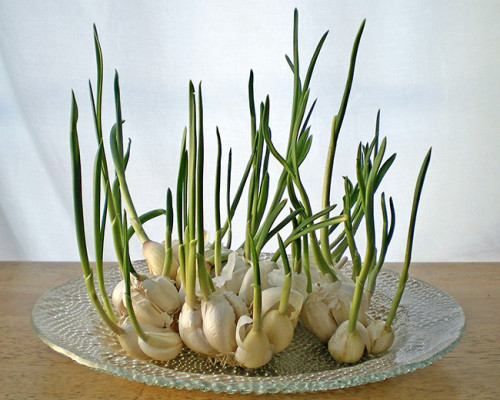
Garlic
When garlic begins to sprout, you can put them in a glass with a little water and grow garlic sprouts. The sprouts have a mild flavor than garlic and can be added to salads, pasta and other dishes.
Bok Choy
Bok choy can be regrown by placing the root end in water in a well-lit area. In 1-2 weeks , you can transplant it to a pot with soil and grow a full new head.
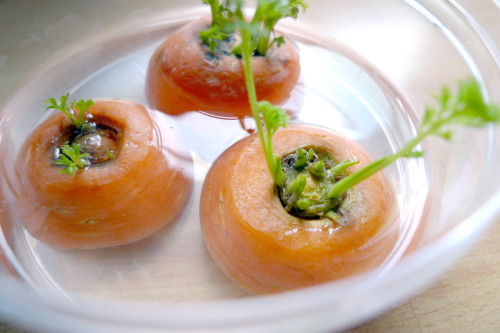
Carrots
Put carrot tops in a dish with a little water. Set the dish in a well-lit room or a window sill. You’ll have carrot tops to use in salads.
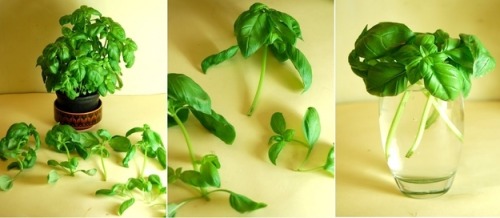
Basil
Put clippings from basil with 3 to 4-inch stems in a glass of water and place it in direct sunlight. When the roots are about 2 inches long, plant them in pots to and in time it will grow a full basil plant.
Celery
Cut off the base of the celery and place it in a saucer or shallow bowl of warm water in the sun. Leaves will begin to thicken and grow in the middle of the base, then transfer the celery to soil.
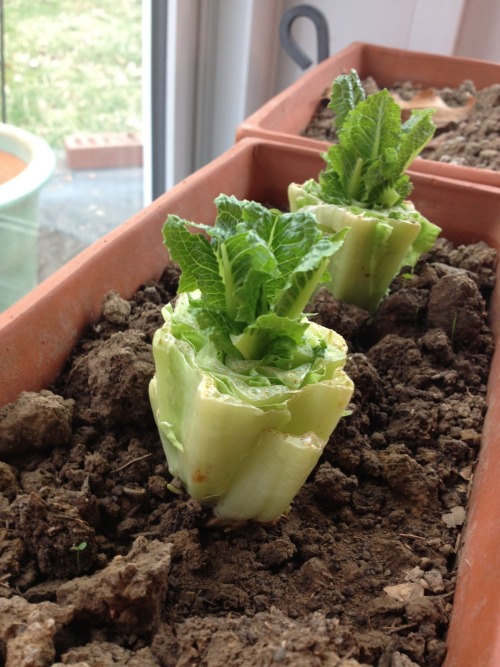
Romaine Lettuce
Put romaine lettuce stumps in a ½ inch of water. Re-water to keep water level at ½ inch. After a few days, roots and new leaves will appear and you can transplant it into soil.
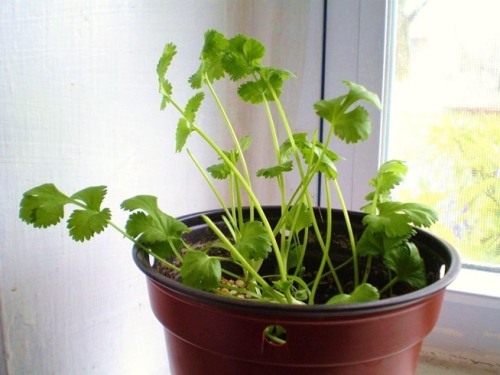
Cilantro
The stems of cilantro will grown when placed in a glass of water. Once the roots are long enough, plant them in a pot in a well-lit room. You will have a full plant in a few months.


Printed Solar Bio-Batteries
Led by biotechnologist Marin Sawa, a group of researchers at Imperial College London have devised a way to print solar cells onto paper. They use an inkjet printer to place a conductive layer of carbon nanotubes and a layer of living cyanobacteria to create devices which can capture and store solar energy.
In their proof-of-concept experiment, the cyanobacteria survived the printing process and were able to produce energy from photosynthesis. The trial panel was palm sized and gave enough energy to power a small LED light. Even better, being little more than paper, carbon, and bacteria, the bio-cells are fully biodegradable.
The work is part of an emerging field of science called microbial biophotovoltaics (presumably related to the biovoltaics I’ve mentioned here before) which uses algae and cyanobacteria to generate energy. The energy generated may be small, but it’s also cheap and easy to manufacture, and the microbes can continue generating electricity after dark, using compounds made during daylight.
The bio-batteries aren’t intended to replace standard photovoltaics for large scale energy production. Instead, they can provide an inexpensive and renewable source of energy for specific uses, such as air quality monitors and healthcare applications.
“Imagine a paper-based, disposable environmental sensor disguised as wallpaper, which could monitor air quality in the home. When it has done its job it could be removed and left to biodegrade in the garden without any impact on the environment.” – Marin Sawa
Sawa et al (2017) – open access

Do you know how to take care of your sewing machine?
Taking care of your machine over the long haul influences the longevity of your machine. It could mean the difference of having a machine over the span of 5 years versus 50+ years. Can a sewing machine even last 50 years? Yes, with proper maintenance and care it can! My personal machine was released about 1960 making it 58 years old. My grandmother’s Singer Touch and Sew is around 50 years old and she uses that machine so much it’s ridiculous it’s still working!
So how do I take care of my machine?
Glad you asked! It’s really not that hard to take care of your machine, in fact, the instruction booklet that came with your machine probably tells you how. Some new machines make it really difficult to take them apart to clean them up, but you’re going to want to figure out how!
If your instruction booklet doesn’t tell you how to clean your machine, below are some pictures from my own instruction booklet. Most machines are very similar and you can generally follow the same instructions.


Here’s some general advice for cleaning your machine:
Firstly, dust out your machine. This means removing all the lint that gathered up from your last project (or projects). You can take compressed air and blow out your machine, or, like me, you can take a small, soft paint brush and gently brush it out.
Second, time to oil your machine! You can find sewing machine oil at almost any craft store. I recommend one with a zoom spout to make it easier to oil your machine.
So what do you oil? Pretty much any moving parts except gears and your belt. (Take a look at the pictures.) Work in the oil as you apply it by turning the hand wheel toward yourself. Also be sure not to put oil anywhere you would have thread or fabric moving through. Those places generally aren’t meant to be oiled and it will end up on your projects!!
Lastly, lubricate your gears. This is also a great time to check the condition of your gears. Gears wear down over time and I can say that I’ve had to replace gears before due to wear and tear. The teeth on the gears break with age (or improper machine use), although it can take a while before that happens.
LUBRICANT IS NOT THE SAME AS OIL. DO NOT OIL GEARS. NO. STOP. BAD. You can also buy this at your craft store, most likely.
How often should I be dusting and oiling my machine?
After every major project, or, if you’re working on a very large project (like a leather jacket), you might want to do it sporadically throughout.
How often should I lubricate my machine?
If you don’t use your machine frequently, once every two years is probably acceptable. I use my machine frequently enough to justify once a year.
OMG I FOUND BROKEN PARTS WHAT DO I DO?!
Google it. Most likely someone has already had the same problem and it’s probably documented somewhere on the internet just waiting for you to stumble across. Gears and belt replacements are the most common.
If you’re looking for Singer Sewing machine parts, I highly recommend ordering parts from www.singeronline.com. Not only are they reasonably priced, but their products are high quality. I’ve ordered many parts from this business and they have my star of approval. They also have a youtube channel and document some common problems with machines as well as how to fix them. Check it out: Singer Online YouTube
“my favorite thing about you is your smell
you smell like
earth
herbs
gardens
a little more
human than the rest of us”
- rupi kaur, milk and honey
I have started playing Stardew valley again, this time together with my boyfriend and honestly it’s wholesome… like, not only Stardew Valley per se has a great calming and fulfilling atmosphere, but being there with my boyfriend, waking up with him at 6 am just like irl but here it’s to water crops, cut a few trees, perhaps fish and chat with the community? I love it.
Everyone should garden
Sometimes when I’m talking to people about sustainability they’re like, “well, not everyone wants to garden” and it’s like, on the one hand I’m sure that’s true because of the diversity of the human experience means that someone out there would hate gardening no matter what.
But on the other hand…. what???? Why would someone NOT want to experience the miracle of life and then have the freshest ingredients possible to cook with??? All while releasing no green house gasses and being super cheap???
Humans have literally lived forever surrounded by plants with cultivating plants as a vital part of how we have lived for thousands of years and you’re telling me that we should stop doing that because some people don’t like to garden??
Gardening isn’t a hobby! It’s a way of life that we all need to be living if we can because our current way of life is unsustainable! Also everyone that can garden should so we can support the people who can’t. Gardening is what made us human and we can’t stop now.


Start a 1-Acre, Self-Sufficient Homestead
Expert advice on how to establish self-sufficient food production, including guidance on crop rotations, raising livestock and grazing management.
By John Seymour
Illustration by Dorling Kindersley
-
 love-and-be-loved reblogged this · 1 year ago
 -
love-and-be-loved liked this · 1 year ago
-
 maia-radfemdu liked this · 2 years ago
 -
 feast-of-the-rabb1t liked this · 2 years ago
 -
 saccharineomens reblogged this · 2 years ago
 -
 judogo reblogged this · 2 years ago
 -
 yenoodlethings liked this · 2 years ago
 -
 an-anarchist-shapeshifter liked this · 3 years ago
 -
 anarchistmemecollective liked this · 3 years ago
 -
 cielosphere reblogged this · 3 years ago
 -
cielosphere liked this · 3 years ago
-
 marked-by-moonlight reblogged this · 4 years ago
 -
 mjimen19 reblogged this · 4 years ago
 -
 your-mighty-words-astound-me reblogged this · 4 years ago
 -
your-mighty-words-astound-me liked this · 4 years ago
-
 notyouraveragedragonenby liked this · 4 years ago
 -
notyouraveragedragonenby reblogged this · 4 years ago
-
 anotherdayforchaosfay reblogged this · 4 years ago
 -
anotherdayforchaosfay liked this · 4 years ago
-
 bumblebeeappletree reblogged this · 4 years ago
 -
bumblebeeappletree liked this · 4 years ago
-
anotherdayforchaosfay reblogged this · 4 years ago
-
 pumpkinandsunflower reblogged this · 4 years ago
 -
pumpkinandsunflower liked this · 4 years ago
-
 veri-bright liked this · 5 years ago
 -
 dawable-head-space liked this · 5 years ago
 -
 electronic-mail liked this · 5 years ago
 -
 dirtyhopepunk reblogged this · 5 years ago
 -
 relax-and-read-on liked this · 5 years ago
 -
 shelikesmysparkles reblogged this · 5 years ago
 -
 tomb-boi liked this · 5 years ago
 -
 kerkira liked this · 5 years ago
 -
 gomezdetoledo liked this · 5 years ago
 -
 bleach-forbreakfast liked this · 5 years ago
 -
 notreallymagical liked this · 5 years ago
 -
 birdlung liked this · 5 years ago
 -
 chillgamesh-the-swing reblogged this · 5 years ago
 -
 tree-whisper liked this · 5 years ago
 -
 thenekonomicon liked this · 5 years ago
 -
 ladymoonjelly reblogged this · 5 years ago
 -
ladymoonjelly liked this · 5 years ago
-
 the-wander-light reblogged this · 5 years ago
 -
 2wo-knav3s liked this · 5 years ago
 -
 intrazone liked this · 5 years ago
 -
 bee-the-farmhand reblogged this · 5 years ago
 -
 lunar-girl40 liked this · 5 years ago
 -
 whatthefuckwhoevenknows reblogged this · 5 years ago
 -
 rainbowwordstrings reblogged this · 5 years ago