Anonymous Said: Your Art Is So Natural And Expressive, I Love It! I Was Wondering How You Go About Cuddles??


Anonymous said: Your art is so natural and expressive, I love it! I was wondering how you go about cuddles?? Or just fitting two people together so it’s not awkward or stiff looking, it’s something I’ve struggled with but look to your art to see how you solve it. I was wondering about your thought process when organizing a drawing like that (I hope the English is okay!)
Thanks! ^^ When I read your first question I thought you’re asking about real cuddles :’) Anyway, this is how I go about it, sometimes I alredy have a pose in mind, but then it’s just trying until I get it right. Sometimes I use references. But this technique is really relaxing, I love to draw this way :D Hope it helps!
More Posts from Arttuti and Others

Hi Fer! I simply love your blog and tutorials so much, but I was wondering on how you draw masculine bodies? My drawings have been female and slender men, and when I try... it just doesn't look right. So any tips can be really helpful because I want to try and draw different body shapes. Thank you so much! <3
easiest thing is probably to widen the shoulders and up the muscle mass! it really helps to study anatomy so you know which areas to exaggerate. a more muscular/masculine person will have a more defined sternocleidomastoid (in blue) and bigger traps (green); basically a thicker neck. playing with the shoulder to hip ratio will help as well. i guess if you want a super manly man just make him look like a dorito


I have two questions! First: have you ever thought of doing a tarot card suit for your characters? I think it'd work really well for them! And two: help me how do I draw legs
@gravitality
Hi!! I’ve absolutely been thinking about that, yeah, in fact I recently talked about that to my boyfriend just recently. It’ll likely happen after october! And to answer your second question! I made a thing on legs that i hope you’ll find useful!!
So. I’ve already explained basics on legs here, but I don’t think it hurts to go through some extra details to help you understand legs some more.

The very basic thing is to imagine legs as teardrops. Again, this has already been covered in said tutorial above, but I figured it’s still good to mention even the most basic thing that I know of. I still highly recommend you check it out to get in more detail and to see some other examples and practices that you do. But basically, think of legs in the shapes of teardrops, when it comes to shape. If you need a simple stick-figure to connect the legs in the first place, make sure that they bend at the knees a bit so that the legs don’t come off as stiff and unnatural.

As you can see, this method works perfectly for realistic legs as it does for stylistic ones. Remember to use these as a guideline, never to be the exact base of the legs you will be drawing. If you draw traditionally, remember not to draw these guides too hard, or they will be hard to erase/do freestyle!

But how do you actually draw out the legs without drawing them perfectly straight, as shown to the left? The trick is to add volume to them, and how you do that can be winged to your own liking. The idea is to think in curves. As no leg is perfectly straight. You may make these curves minimal if you don’t want them to be curvy, but keep in mind, still, that not even your own bones are perfectly straight, so it is highly recommended that you make them bend, at least a little.

It all depends on how you draw them as well. Say you put your legs together, as shown in this picture, what happens to the fat and muscle? Naturally, they press together, much like how thighs squish on the surface when you sit down (I’m sure most people know what I’m talking about). Make sure this shows in your art! This is very important to keep in mind, because it makes it all look more natural and believable. Try to cross your legs or stand up and sit down again for real-life examples!


The same applies for stretching your legs, more or less, except they appear to become more ‘hollow’ and slimmer. They become less soft to the touch, too, and might show. Try stretching your legs and feel where the muscles tense and where it feels ‘hollow’. This is very helpful with your art.

Many leg tutorials talk about legs without mentioning the behind. It requires a tutorial on it’s own, in all honesty, but this is the most simplest way to draw it connecting to the legs. Remember that it comes in many different shapes, and this is just a super basic guide! Two circles overlapping, while following the line and flow of the legs. Remember the muscle/fat as mentioned above!

Okay, so we got the basics of leg shapes figured out? What if you want o draw them in a certain pose, or with a certain silhouette, but perhaps do not have the reference for it? Or you want to blend your style into it? The key is to not shy away from doodling the form. Make mess, draw lightly and don’t care about the anatomy. That way you’ll get everything down without it appearing stiff. You can clean up the sketch later, always, and if you can, use a reference after you have drawn your pose, to correct your drawing.

Remember that the hips do a lot to the pose of the legs! Make sure they are in flow with your legs, so that it can look more natural. Remembers that hips ‘rotate’ with the spine.

I’ve talked about this method before when it comes to posing, and the same applies for the legs. One way to make legs appear ‘steady’ is to picture them standing in a line, and one of those legs need not to stray from the lines too much, making it steady. If you want a dynamic pose despite the steady pose, you can always have the other leg stray from the line, since it only matters that one leg is steady. This method can create good, casual poses without making them appear boring. (also notice how the teardrop shapes are used here, despite the highly stylized legs)

Do you want a highly dynamic pose, or them to appear unsteady, then skip the line entirely and make both legs aim away from it completely. As you can see, the legs appear more moving, in action, as if they’re fighting, falling, or dancing. As you can imagine, this is not a pose that one could stay steady on, suggesting that it’s taken mid-movement. More about posing and this ‘line’ method is talked about in this tutorial.
Hope this helped you, if you have any questions let me know, and if you’d like to check out all my tutorials they can be found here!
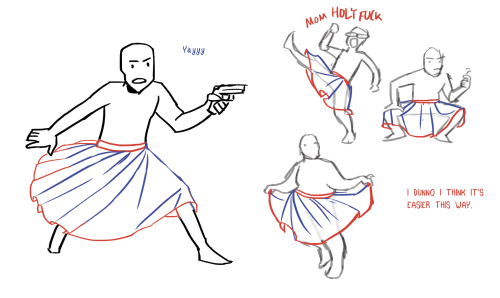

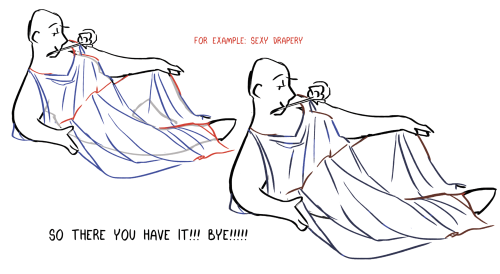

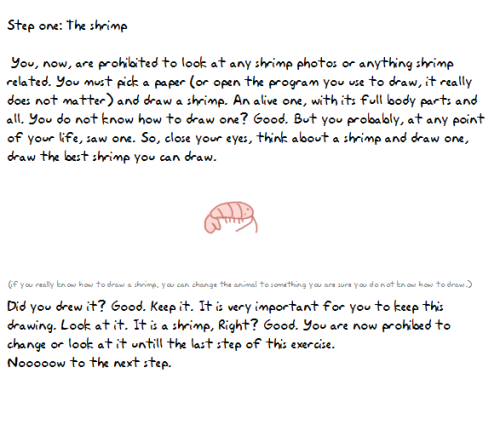
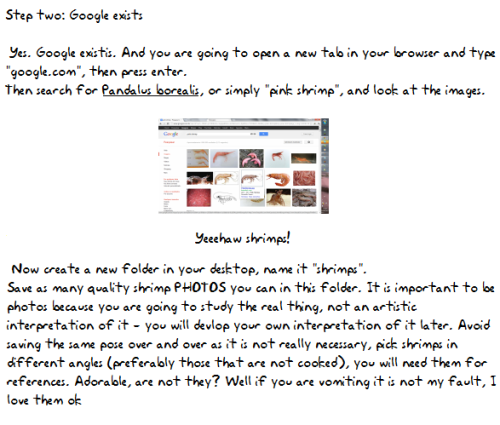
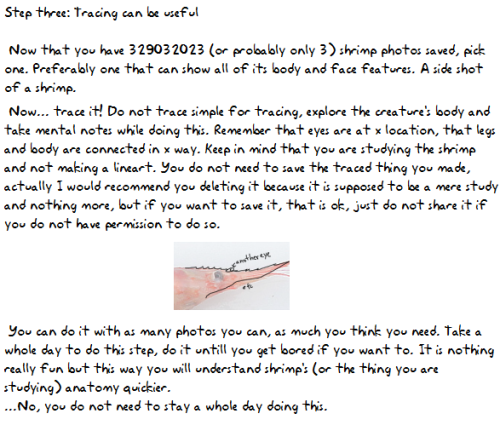
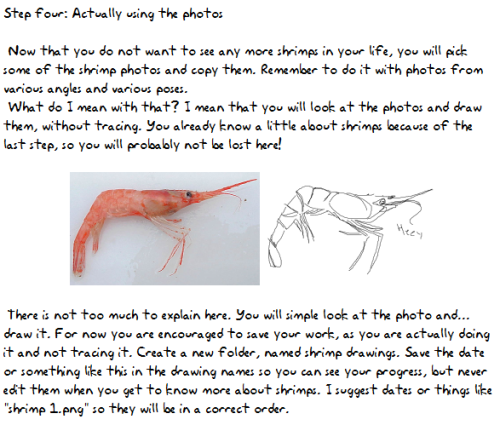

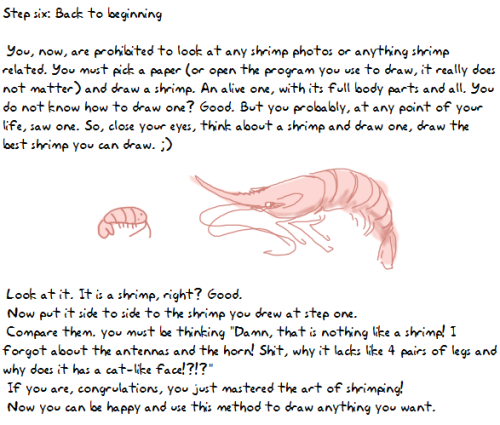
How I pratice drawing things, now in a tutorial form. The shrimp photo I used is here Please support me on patreon so I can make more tutorials! :)
Basic Gesture and Body construction tutorial.
I made this tutorial for a friend who needed some advice but if it helps anyone else, free free to use!


This is for basic body construction, try it from life drawing or from a website that have these life drawing poses! Remember, don’t rush the process and don’t feel frustrated when it isn’t perfect, it takes lots of practice!
hey i was wondering how you draw female faces? drawing guys im like hell yeah, but ladies im like hell neh. would you be able to give an example with rey?
Ahhh I’m not the best person to ask for drawing females but um I think generally you just have to be a little more careful with your marks. Everything should be a little softer, more curves, etc. Rey’s a little difficult bc she has a pretty boxy/angular face but her facial features are more delicate.

Of course these are just suggestions and stuff I noticed and not set rules ;;;; but I hope it helps a bit!!
Comic Pages Storyboard Tutorial
OKAY SO! @biazerod asked me a little help on storyboarding and i decided to make this tutorial…i’m not a professionist. so don’t take these as golden rules…just advices! and as always sorry for the english FIRST THING FIRST! the storyboard part is the most important phase in a comic page ! you can spend an entire day storyboarding! because it’s the structure, the essence of the page! here’s some tips : 1- a page can start from 1 panel/frame (called splash page!) until how many f*cking panels you can fit ! (some pages , especially in french comics/bd can reach 24 panels/frames!) Exaple of splash pages:


(these are from the green lantern,DC and the newest Thor ,marvel ) Splash pages are a priority of American comics, you rarely can find them in french Bd ! they represent a scene of impact! a fight! a revelation! be careful! use it only one if two times on a range of 50 pages! cuz it cut the narration! instead in french bd you find this :


first one is from Blacksad 2# and second one is from Atar Gull see how high the number of the frames is?? the number of frames is very important in a page because it decide the narration time! :D also it all depends on the kind of ‘’direction’’ you want to use on your comic! so be really careful when you decide the number of the frame! LET’S PASS ON THE CREATION! 1- when you have a page that contains more than 3 Frames ALWAYS. ALWAYS HAVE AN ESTABLISHING SHOT!

the establishing shot is fundamental! BECAUSE READERS CAN UNDERSTAND WHERE THE CHARACTERS ARE! DON’T DO A COMIC PAGE FULL OF FACES !

DON’T DO THIS! LET THE CHARACTER BREATH! LET THE READER BREATH! PLAY WITH YOUR CAMERA! YOU HAVE THE POWER! in a comic page, is important to put the camera far away from the character most of the time! play with the different shots!

(found this on google) WATCH MOVIES AND TV SHOWS. lot of them can help you so much you have no idea! a comic artist and a director do the same job when creating a story 2- Candy eye this is a tricky trick that can help you with the audience! when a character is saying something important or you have to introduce them , USE THE CANDY EYE DUDE.

the candy eye is , basically, a bust shot where you show the character,their features , usually with a cool or a funny expression ( or of course it depends from the situation) and believe me WORKS 10/10 with the audience ;) 3- HIGHLIGHTS THE IMPORTANT SCENE IN THE PAGE!

FINAL TIPS: - when you’re doing dinamic poses try and try again! the first one isn’t always the best! -USE REFERENCES. -A STORYBOARD PAGE CAN REQUIRE EVEN 4 HRS IF NOT AN ENTIRE DAY IF NOT AN ENTIRE WEEK. REMEMBER THAT THE STORYBOARD IS THE ESSENCE. AND THE REST IS DECORATION. - IMAGINE THE SEQUENCE! NOT THE SINGLE PAGES. THINK IN SEQUENCES! imagine what would happen after the page you are creating! connect the various pages NOT THE SINGLES FRAMES ! YOU’RE CREATING A STORY! NOT A SINGLE ILLUSTRATION! -AGAIN DON’T DO PAGE OF FACES. most important thing:

if the page you’re creating it stresses you! STOP. continue it when you are in a better mood ,dude. our job requires lot of time and effort, but it should be the job we love. so don’t stress yourself and keep calm. hope this is useful. don’t take this as golden rules, this is just the way i work :)
-
 knightsmove reblogged this · 3 months ago
 -
 zstacyi liked this · 5 months ago
 -
 whatisgrass liked this · 7 months ago
 -
 dthuym liked this · 11 months ago
 -
 cc-starship liked this · 1 year ago
 -
 beetle-ze-bub liked this · 1 year ago
 -
 chad-enigma liked this · 1 year ago
 -
 annaloveshjp liked this · 1 year ago
 -
 infernonightmare liked this · 2 years ago
 -
 chasing-orana liked this · 2 years ago
 -
 avidreader68 liked this · 2 years ago
 -
 acnelli liked this · 2 years ago
 -
 likadastuff liked this · 2 years ago
 -
 thechairmanofdeadpoets liked this · 2 years ago
 -
 astrqnomy reblogged this · 2 years ago
 -
 gracedandelioninkmind liked this · 2 years ago
 -
 cissona liked this · 2 years ago
 -
 lunarfly liked this · 2 years ago
 -
 oldfashioned-loverboy liked this · 2 years ago
 -
 mkaugust liked this · 2 years ago
 -
 glowinthedarkalpacas liked this · 2 years ago
 -
 oxydiane liked this · 2 years ago
 -
 squintclover liked this · 2 years ago
 -
 dilfgp reblogged this · 2 years ago
 -
dilfgp liked this · 2 years ago
-
 ihavea-natural-curiosity reblogged this · 2 years ago
 -
ihavea-natural-curiosity liked this · 2 years ago
-
 romqnticstylez liked this · 2 years ago
 -
 dramatic-long-coats liked this · 2 years ago
 -
 roimp reblogged this · 2 years ago
 -
romqnticstylez reblogged this · 2 years ago
-
 cheshireking liked this · 2 years ago
 -
 ghosts-boos-blog liked this · 2 years ago
 -
 hien777 reblogged this · 3 years ago
 -
 lilyoftheleighighvalley liked this · 3 years ago
 -
 sobersunite liked this · 3 years ago
 -
 happycandyface liked this · 3 years ago
 -
 ggeveryone99 liked this · 3 years ago
 -
 appl9cider liked this · 3 years ago
 -
tuturialreblog reblogged this · 3 years ago
-
 kieranfin reblogged this · 3 years ago
 -
 zilch-zero-nothing liked this · 3 years ago
 -
 afigurelikeadoll reblogged this · 3 years ago
 -
afigurelikeadoll liked this · 3 years ago
-
 a-verified-rat liked this · 3 years ago
 -
 veronnie-gryffindork liked this · 3 years ago
