Masters Of Anatomy


Masters of Anatomy
More Posts from Arttuti and Others


more mini tutorial gifsets :) for the video version check out https://www.instagram.com/p/BGZfej3R_OM/?taken-by=loisvb


How I Animate

The Technique:
I draw the frames and then I use the liquify tool to push the lines into the next frame and redraw them where I need to. This allows me to keep the lines consistent, but gives me the control of frame by frame animation bc I am still making each frame manually! I also use 3d models as reference to help me with the angles! Super important to use reference while you animate (and with art in general), if youre no good handling 3d models then act it out and record yourself!

The Theory:
i think most people are at least loosely familiar with the 12 principles of animation (if youre not, heres a 2.5 minute video showcasing them!), but may not necessarily know how to employ them. the main 3 i tend to focus on when I animate is rhythm, telegraphing, and inertia so ill cover those there 👍
1. Timing & Rhythm
Timing is how you space out your frames both in how long an individual frame is held for, and also when you drawn an inbetween of two frames you can favour one frame slightly more than the other instead of drawing the exact average of the cels, giving the favoured cel more timing weight.

Left line has the cels evenly spaced out on the timeline, right holds the first cel for longer and the second cel slightly favours the last frame. It creates a more interesting rhythm to the animation! Rhythm is how I think of animation timing. Theres a beat like a song to every animation I make, and creating an interesting beat is what makes an animation fun to watch (for me, anyway):

2. Anticipation / Telegraphing

Before I animate a big change in movement, I like to telegraph that its coming. Usually this is doing a little counter movement in the opposite direction, but thats not the only way to telegraph a motion, e.g. eye movement can telegraph a head turn!

3. Follow-through / Overshoot / Inertia


Unless the movement is mechanical, it wont come to a hard stop and will have some level of bounce or easing out to it. How much "bounce" you add will have a big impact on how the animation feels, but a very subtle bounce will add a natural feeling to the end of a motion.

Secondary animations will use a lot of this, note that the head and the hand have a small amount of continuous motion (primary animation), and then the hair has a lot of bounce and inertia (secondary animation which reacts to the primary animation). Note the different amounts applied to the braid vs the sideburn vs the bangs
anyway! I hope this was insightful ❤️ if you like my art you can commission me by the by :)
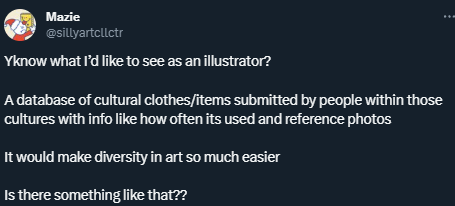
tweet
Something like this would be so colossally helpful. I'm sick and tired of trying to research specific clothing from any given culture and being met with either racist stereotypical costumes worn by yt people or ai generated garbage nonsense, and trying to be hyper specific with searches yields fuck all. Like I generally just cannot trust the legitimacy of most search results at this point. It's extremely frustrating. If there are good resources for this then they're buried deep under all the other bullshit, and idk where to start looking.

I see a lot of beginner artists missing the mark on drawing profile views, particularly on eyebrows & eyes—I hope this helps! 💖 Obviously you can stylize things however you want, but it’s important to reference & understand how things work in real life before attempting style if you’re concerned at all about believability.

THE LAYERS CHEAT SHEET PART TWO (PART ONE HERE) Once again, I’m no expert- there are things about these layers I probably haven’t covered, so please try them out for yourself! Layers 1-7 help your contrast. They are usually a pair of the former two groups I went over in my last post. 1. OVERLAY: Helps your contrast by boosting your lights and darks, while the more mid tone pixels aren’t affected as much. It does this based on the layers beneath it. “Screens” the lights, “multiplies” the darks. 2. SOFT LIGHT: Similar to overlay, but a “softer” effect. You can think of soft light as more transparent. 3. HARD LIGHT: You can look at hard light as an intense version of overlay, with much brighter colors and a much less transparent look. 4. VIVID LIGHT: This is the heavy metal version of overlay- think of it similar to color dodge and color burn. Very intense colors, good for finding interesting lighting and color combos. 5. LINEAR LIGHT: Crazy amounts of contrast and color is added here, even more than vivid light. so heavy metal 6. PIN LIGHT: This one is interesting because besides it also being an intense contrast layer, it can add random noise to the active layer. Apparently this is a combo of the lighten blend mode on the light pixels and darken on the dark pixels, but the noise effect is what makes it really interesting imo. 7. HARD MIX: You will turn this mode on and be like “no” but it is actually adjusting its fill will reveal another overlay-ish type layer. It throws the colors on the active layer towards a more primary color such as blue, or magenta. _____ 8. DIFFERENCE: This will invert your colors, taking into account the layers below. If colors are very close, they will be black. 9. EXCLUSION: This also inverts your colors, taking into account the layers below. If colors are very close, they are grey. Exclusion and difference are layers that would be good for graphic pieces, I haven’t really gotten used to incorporating them in my painting workflow. 10. SUBTRACT: Similar to the above layers, but more intense. You will notice that the darker you make your active layer with Difference, exclusion, and subtract, the lighter and more transparent looking the result will be. 11. DIVIDE: Divide, however, usually results in crazy highlights that are pretty opaque unless the layer is fairly light, and then it will begin to go transparent. ___ 12. HUE: Makes the lower layer take on the hue of the active layer. 13. SATURATION: The lower layers take on the saturation of the active layer. 14. COLOR: The lower layers take on the color of the active layer. 15. LUMINOSITY: The lower layers take on the luminosity, or brightness, of the active layer. Once again, I’m no expert, but I hope this helps. Thanks guys! http://drawmaevedraw.tumblr.com/


-
 kattperson reblogged this · 1 month ago
 -
 snap6ack reblogged this · 1 month ago
 -
 the-letter-horror-lover liked this · 1 month ago
 -
 honeyed-pines liked this · 4 months ago
 -
 ijustworkheredude liked this · 4 months ago
 -
 artking-4 reblogged this · 4 months ago
 -
 overbaked-beans liked this · 4 months ago
 -
 dreamingnereid reblogged this · 4 months ago
 -
 oracle-cassandra reblogged this · 4 months ago
 -
 rdqt reblogged this · 5 months ago
 -
rdqt liked this · 5 months ago
-
artking-4 reblogged this · 5 months ago
-
 cremebrulee-69 reblogged this · 6 months ago
 -
cremebrulee-69 liked this · 6 months ago
-
 supersecretrealaccount reblogged this · 6 months ago
 -
 mythicalfawn liked this · 6 months ago
 -
 karinikkisposts liked this · 7 months ago
 -
 booktoad liked this · 7 months ago
 -
 oh-a-very-toxic-octopus reblogged this · 8 months ago
 -
artking-4 reblogged this · 8 months ago
-
 inspiredwriter liked this · 9 months ago
 -
 scullee liked this · 9 months ago
 -
 user-name-h3re liked this · 9 months ago
 -
 felis-insomnis liked this · 9 months ago
 -
 jj-anonymous liked this · 10 months ago
 -
 thebringerofstorms liked this · 10 months ago
 -
 iamsweden reblogged this · 10 months ago
 -
 corvidivus reblogged this · 10 months ago
 -
corvidivus liked this · 10 months ago
-
 cryingbluecactus liked this · 10 months ago
 -
 j-bird05 reblogged this · 10 months ago
 -
 cap-the-winged liked this · 11 months ago
 -
 luneartinspo reblogged this · 11 months ago
 -
 onlyifyoudancewithme liked this · 11 months ago
 -
 b-wutched liked this · 1 year ago
 -
 kobaltcorn reblogged this · 1 year ago
 -
 metal-suicune liked this · 1 year ago
 -
 farosanelgendy reblogged this · 1 year ago
 -
farosanelgendy liked this · 1 year ago
-
 777greywolf reblogged this · 1 year ago
 -
 silverlakelodge liked this · 1 year ago
 -
 smiledog15578 liked this · 1 year ago
 -
 skirtpockets liked this · 1 year ago
 -
 erick097 liked this · 1 year ago
 -
 halstar-the-clown liked this · 1 year ago
 -
 jay-faraway liked this · 1 year ago
